I've been meaning to write a blog post about taking jewellery photos for ages, but I've found a post on
Boo's blog that covers a lot of what I was going to write about and a lot more besides.
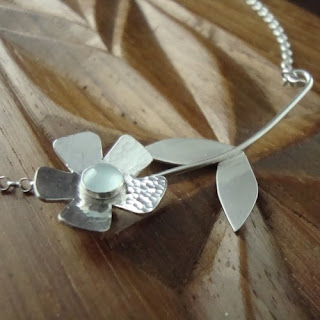
My photos have improved dramatically over the last couple of years. I mean, just compare this photo

to this one!
I spent hours and hours experimenting with different lights and set ups, and now use a light studio like this
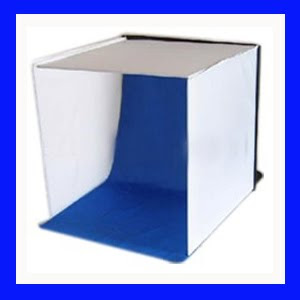
with a brown cloth hanging from the top of the back so that it sweeps down and covers the back and the bottom of the light studio without there being a distinctive line where the back and bottom meet - I will edit this post tomorrow when B has gone back to school with a photo of my set up!
My tips for photographing jewellery are:
- make sure that your camera has a good macro setting. I use a simple compact digital camera, a Sony 1080 cybershot if you're interested. I took some jewellery up to Jessops and the assistant and I spent ages comparing the macros on different cameras! The macro setting is usually symbolised by a flower, and it will allow you to get in close with clear definition.
- use the white balance/iso setting on your camera. This was something that I didn't really know about until this summer when a fantastic photography tutor came in to talk to my advanced college class and show them (and me!) how to make the best use of their camera. It is amazing the difference just changing the light balance on your camera will make, even just choosing one of the automatic settings your camera is programmed with. Before I knew about this tip I thought I could only take photos either in diffused sunlight (my favourite in the summer is early morning or late afternoon sun, taken under the awning over our decking i.e. beautifully clear light, but diffused) or in complete darkness other than my daylight bulbs in the photo studio. Well, the photo below isn't my best ever, but would you believe that it was taken with the jewellery on top of my bag, under the harsh class room lights during my advanced class a couple of weeks ago?! I promise it hasn't been edited apart from cropping and then resizing so that it would load up quicker.
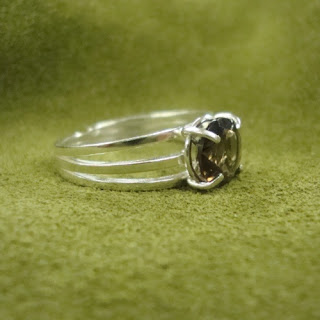
The ring, by the way, was made by one of my talented students. Beautiful, isn't it?
- Think carefully about your background. I chose to use brown as my background as the jewellery shows up well and it's my main 'business' colour. It (and my props) are nice and warm compared to the colder colour of the silver. The wooden props that I use carry a theme through all my photos, and I also like that they have meaning for me. T turned the wooden bowl and cup that I use, and the wooden box contains a came of mancala that my brother brought back from his travels. Have a look at what other people use as backgrounds and props. Remember that you want a theme so that people recognise your photos and so that your website/etsy page etc doesn't look messy, but that doesn't mean that you have to use the same props and colours all the time.
- Take lots of photos from lots of different angles. This is for two reasons: firstly, you want lots of photos so that you can choose the best ones. Secondly, if you are selling jewellery on a website people can't touch it, feel it (obvious, I know) so you have to show it to them as clearly as possible.
I could go on, but I'd only be repeating what Boo has written. She's got more than just the tutorial that I'm linking to here - make sure that you follow the links on the right hand side of her blog to see some more tutorials. The tutorial that you will see if you follow
this link is about building and adapting your own photo studio
for free! I can't believe how versatile it is, and if I can find the time (any one invented that cloning machine yet?!) I will be making my own as it looks more compact and more versatile than my bought one. Make sure that you have a good look at the 'very rough diagram' that Boo has included - it puts my best artwork to shame!


