
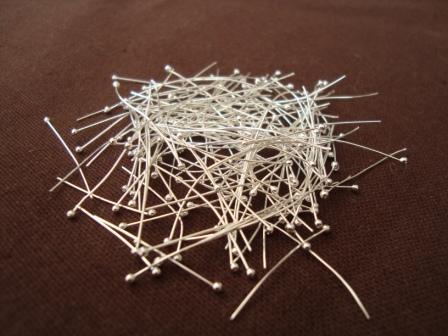
I thought it was about time that I did a photo tutorial on making head pins for the blog - so here it is! Once you get started you'll wonder why on earth you ever bought mass-produced head pins, as you can use this method to make pins in whatever length and from whatever gauge wire you wish.
You will need:
- sterling silver or fine silver wire - I am using 0.4mm sterling silver wire in this tutorial as that is the size that I use most often for earrings, hanging charms off bracelets etc. I also make a lot out of 0.8mm wire for pendants.
- wire cutters
- reserve-action insulated pliers
- small blow torch
- fireproof surface to work on e.g. tiles, firebrick
- quench pot
- safety pickle, pickle pot and brass tweezers if you are using sterling silver, or your preferred method of cleaning the oxidisation off sterling.
- a means of polishing your finished headpins - I prefer to use a polishing tumbler

Make sure that your torch and quench pot are positioned so that you can leave your torch running while you drop a head pin into the water without endangering your hand!
I prefer to hold a bunch of wires in my left hand ready to be picked up by the tweezers in my right. I make big batches of head pins (at least 100 or so at a time), so this tip saves me time.

Light your torch. Hold a piece of wire in your tweezers, about halfway up, and put the bottom tip of the wire just in front of the blue tip of the flame. This is the hottest part of the flame. As the wire melts it will ball up and 'roll' up the wire. I move the wire about a little while it melts, as I find that this helps it to get the smoothest ball possible. Getting a nice smooth ball will take practice, and it is easier to do with thinner gauge wire than thick. If you use really thick wire (1mm or more) you will probably have to use a bigger torch than the one shown, and may have to file the ball slightly afterwards to remove any craters that have formed - although the craters look good in the right design!

Once the ball on the end of the wire is the right size remove it from the flame - but not too quickly otherwise the ball will not stay nice and smooth. I move it away from the blue tip while keeping it in the flame, and then remove it.

Quench your headpin and make another one! I usually make a whole batch and then pop them in the pickle pot to clean. If you are using fine silver you will not have to pickle the head pins - the oxidisation is formed when the copper reacts with the oxygen and heat in the flame, and fine silver has no copper content.
I polish my head pins in my tumbler as it's easy! It also hardens the pins for me, which makes them slightly easier to use in my opinion. Mind you, finding the last few in between the stainless steel shot can be fun - I can still be finding the last few several days later!
One last tip - some people find it helpful to dip the wire end that is to be melted into some flux before putting it in the flame. I don't do this with 0.4mm wire, but it does help to make the balls as smooth as possible when I'm using 0.8mm or thicker wire.
You would not believe the number of photos we had to take of the silver wire melting to try and show you what I was describing! Thank you Mum - and you thought you were just coming over for a cup of tea and a chat!

Great tutorial Jo. I can confirm that they are soooooo easy to make. They're the first thing I had a go at making once I'd bought a blow torch. Must admit though, it never occurred to me to just leave the tourch on the bench so I'd have both hands free!
ReplyDeleteAn obvious-once-you've-heard-it tip for separating the silver form the steel shot: use a magnet!
Thanks Gemma!
ReplyDeleteThanks for the reminder about using a magnet. I must admit that I don't tend to bother with that now - I find it quicker to pour the mix into a baking tray (carefully so it doesn't just bounce out!) so that it's spread out and it's easier to pick the silver out. I run my tumbler at least once a day, so anything I don't find one day I'll find the next!
Thank you so much for sharing this tutorial. I can't even imagine how much work this must have been to put together- your photos are great! I'll be linking in my next Jewelry Roundup.
ReplyDeleteI've just found your blog and will be back. What a great tip to leave the torch on the benchj. I can't believe it never occurred to me! My headpins alwasy end up with the blob on one side but I've been holding the wire up not down. Off to try some now.
ReplyDeleteIt worked perfectly, thank you so much.
ReplyDeleteThat's brilliant Fiona! You'll never buy a machine made headpin again :)!
ReplyDeleteThanks for this excellent tutorial - the best I've seen yet on making this type of head pins. I will link in a future blog post!
ReplyDeleteHello, I had never thought of making my own headpins! Great tutorial. Thank you. xx
ReplyDelete